Tuesday, February 25, 2014

Don't you just love it when a plan comes together!


Woodland Owl Dagger Necklace
   I love making canes and I absolutely was tickled pink at how my owl cane came together.  The hardest thing for me isn't designing canes, it's how to use them after I get them completed.
   The first thing I did was to set aside all the leftover canes from my owl design.  I figured that I could use them as accent pieces for whatever I decided to put together.  Next thing to figure out - what to do with all the left over cane ends and pieces of scrap that are an inevitable part of the caning process.  Well that one is easy enough thanks to Alice Stroppel - I made a "Stroppel" Cane.  The one nice thing about using cane scraps is they make GREAT "Stroppel" canes.  You can see my left over owl parts canes and my "Stroppel" cane below!  I know I'll be using this for multiple purposes because of the wonderful color palette.
Building Block Canes Owl Parts Stroppel Cane
   My first experiment with my Owl Cane was a fun one - using a left over cane from experimenting with different sky techniques to make a stylized cloudy sky.
Whimsical Owl Bangle
 I covered a scrap bangle form with this cane and then added trees, leaves, and my owl.  It's very fun and whimsical - plus it gave me the added benefit of seeing how my stylized sky cane would look as a background.  It has lots of potential for more fun pieces!
   Next, I wanted to give my try to some larger tapered focal beads.  I started out with the center bead.  Using a faux ivory background, I added leaves, branches, and my owl to make a fun woodland bead. I made two slightly smaller beads with my "Stroppel" cane, tapered them and then added a faux ivory ribbon and some left over cane accents.  The three together make a fabulous trio on a simple buna cord.
Tapered Woodland Bead Set/Necklace
   The last piece I worked on ended up in a late night for me, as I fell in love with the design and couldn't stop.  I started with the same faux ivory background, but this time I shaped it into a simple dagger shape.  I added a cylinder of "Stroppel" cane with the same ivory ribbon and accents plus a round ivory bead as a top accent and bail.  You can see it pictured at the top of this blog post.
   Of course, the "Stroppel" Cane and scraps by themselves make some pretty lovely things, too!  Here is just a sampling of the wonderful creations made with leftovers that could have just as easily ended up in the scrap jar.  The frugal artist in me absolutely loves this!  And hopefully I've inspired you to think more about your leftovers, too!

Sunday, February 9, 2014

The Palm Tree Cane

  The winter weather has hit all of the country pretty hard and, according to the silly rodent, we're not done with it quite yet!  Here in North Texas, they're talking freezing rain/snow tomorrow again - ug!  So, now is the time to get back to talking about all my wonderful tropical beach series of canes.  This post is about my Palm Tree Cane.
  The Palm Tree Cane is a great cane and actually much simpler than it looks!  The trunk of the tree is made up of a stacked series of shape changing canes and the palm fronds are actually a modified leaf cane.  Both canes are standard canes that we all have learned on, so it's just knowing how to modify them and put them together!
Palm Trunk Palm Leaf - full Palm Tree Cane   So far, we've created a Water Cane, and made sand and a beautiful tropical sky in my blog post on December 29, so now let's put some trees on our beach.  The tutorial for my Palm Tree Cane can be found in my Etsy shop, or - if you prefer - I do have raw canes already made and ready to go!  Take very thin slices of your palm tree cane and position them on your sand.  Vary the size of your cane (or thickness) to create depth.  The smaller or thinner slices put towards the top of your island and make your cane bigger or thicker as you move down.  Gently press your canes flat so that you don't distort them.  The thicker slices will create larger trees.  Take extra special care smoothing out the translucent edges so that they're soft and not as defined.  If you choose, carefully trim off the thicker translucent edges to get less of a 'halo' effect.  You can bend the tree or make it straighter to give them more character.  Continue to smooth the trees into your beach scene with a brayer or by gently rolling your bangle on your clean work bench.
  We've already created our Flamingo Cane, so the next step will be adding a few shells to the beach!  Look for that post in the upcoming weeks!  In the mean time, enjoy the end of winter and dream of warm weather to come!
Teaser #4

Tuesday, February 4, 2014

Cane Designs - The Owl Cane!

Owl Cane   
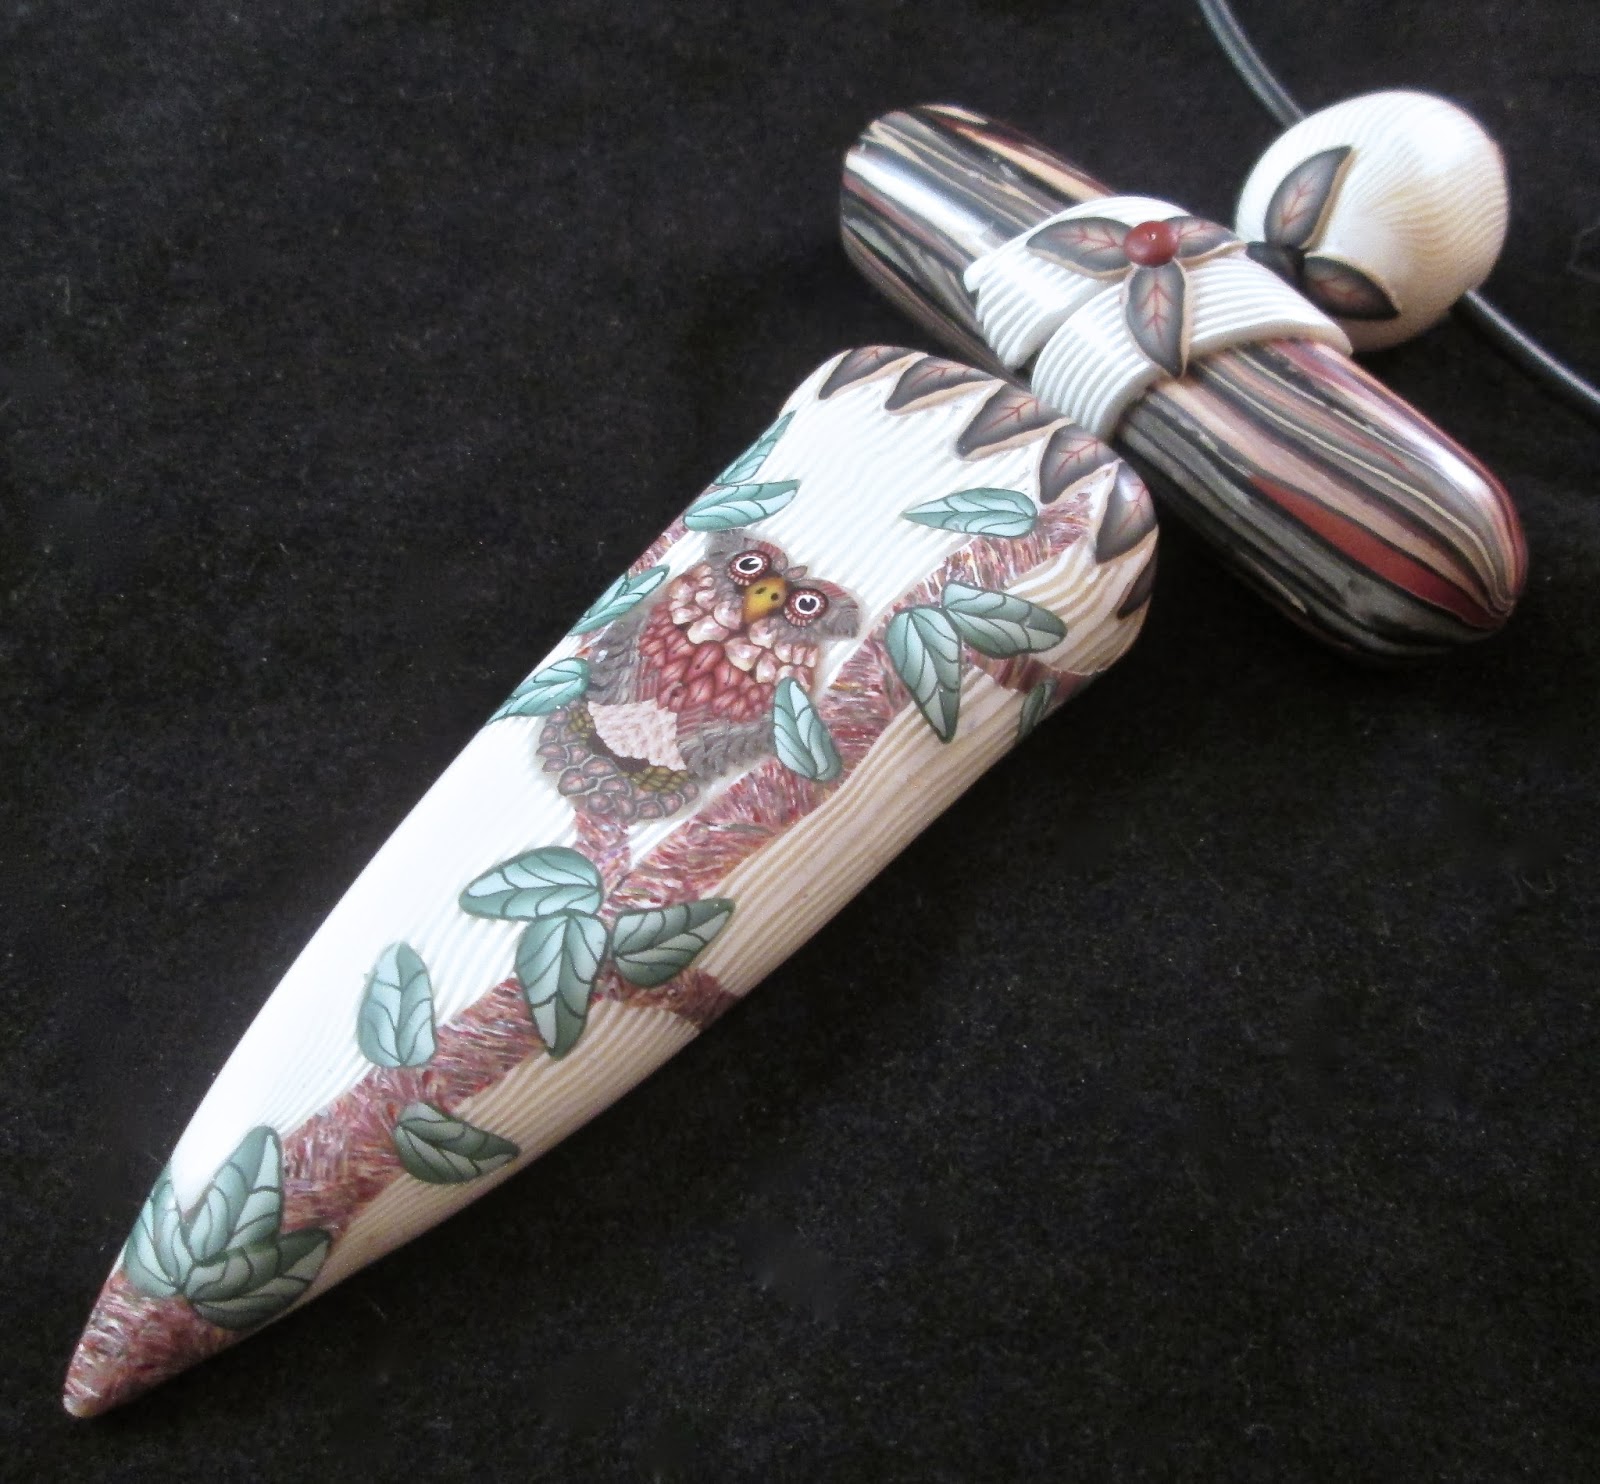
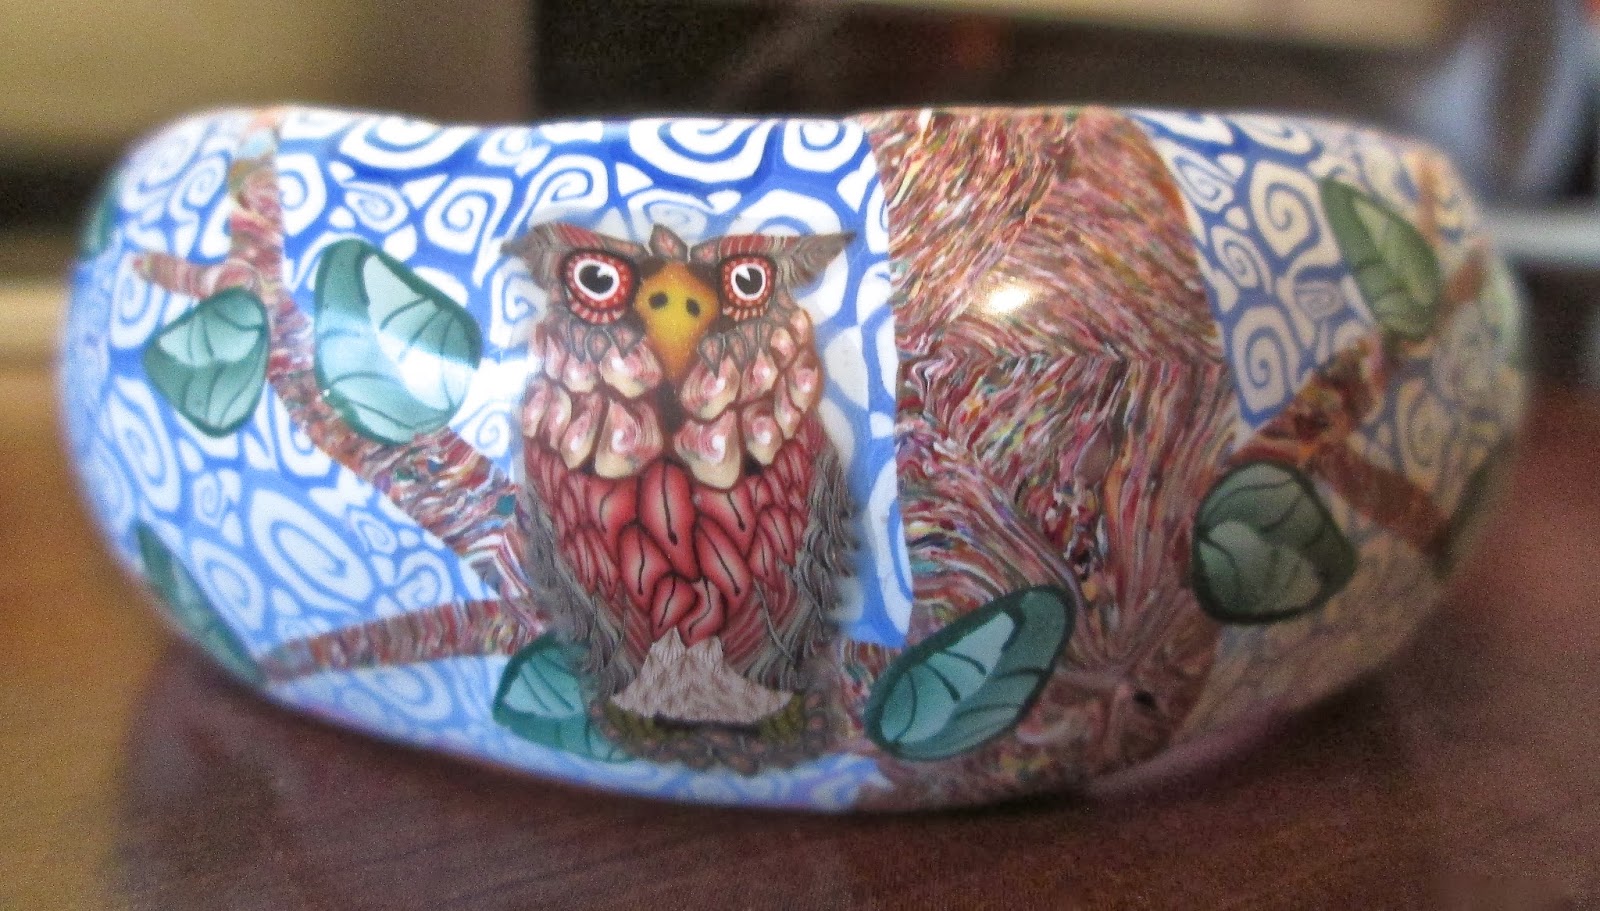
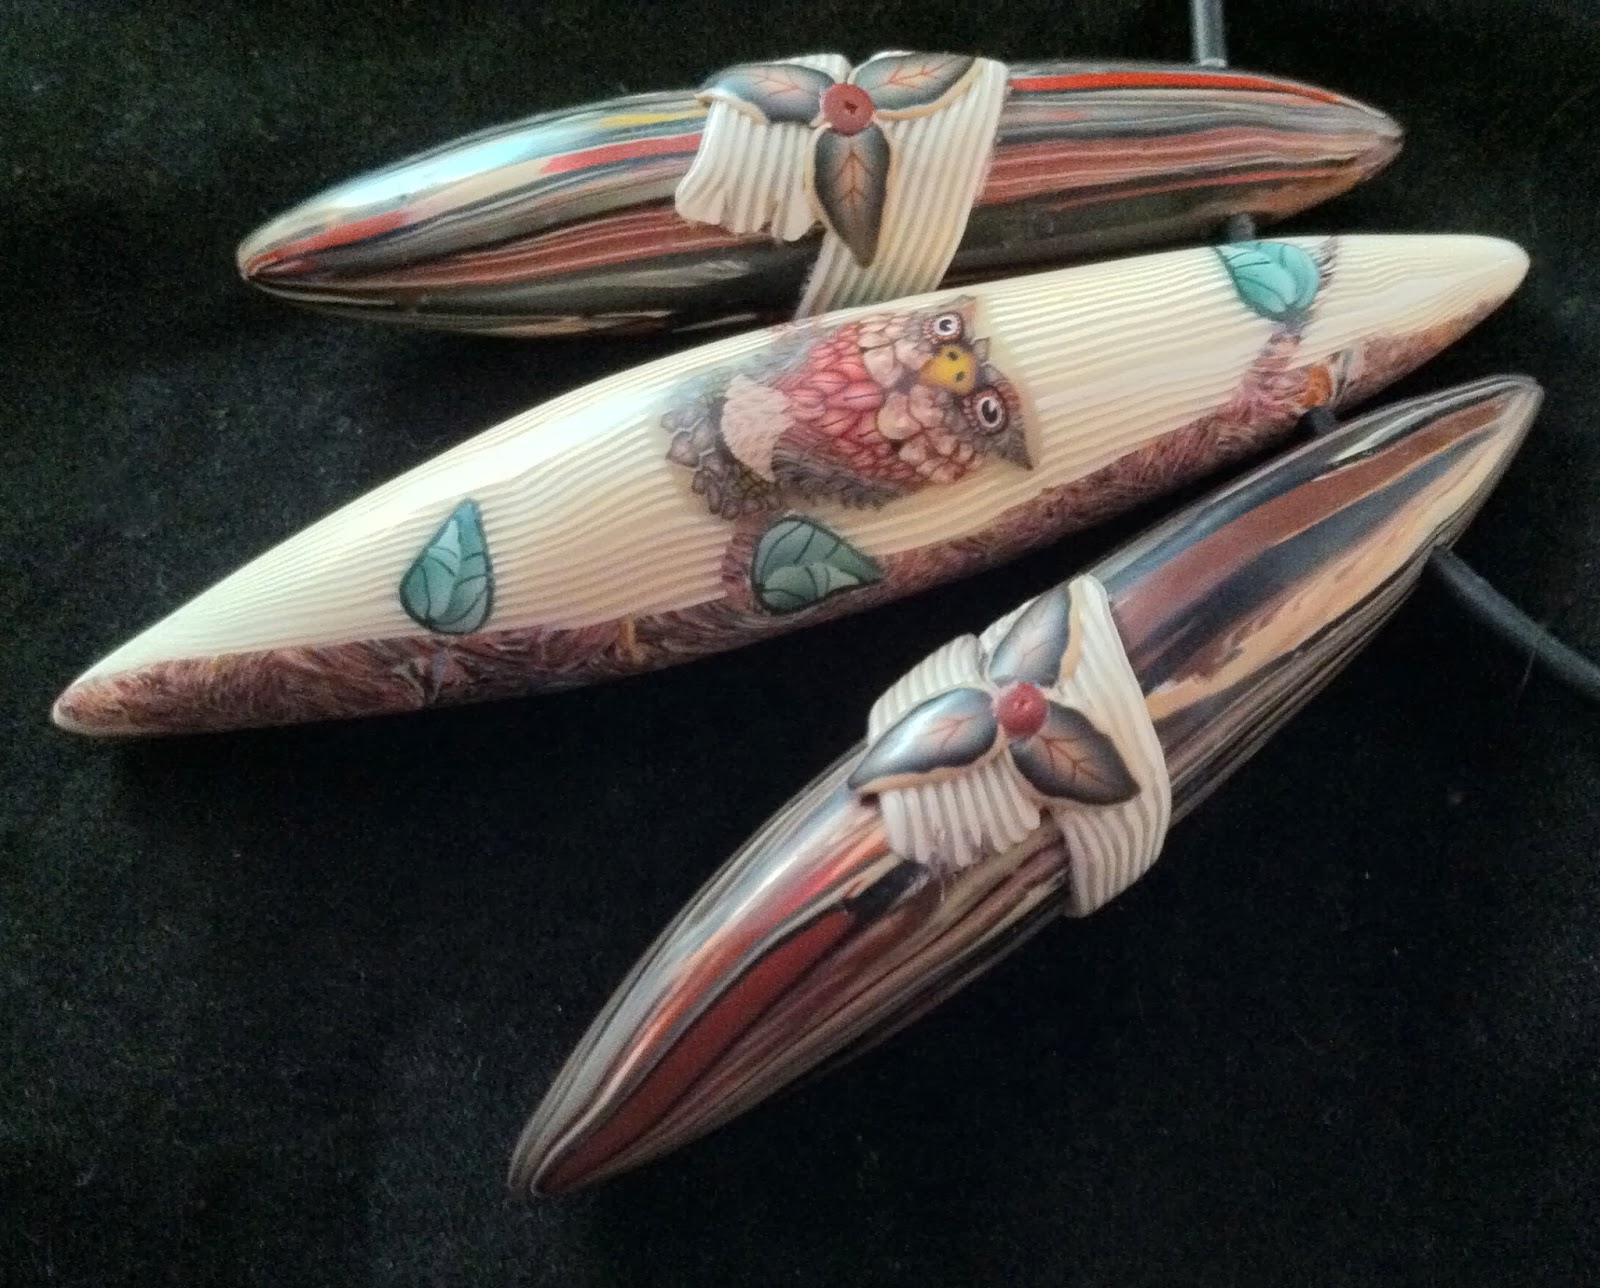
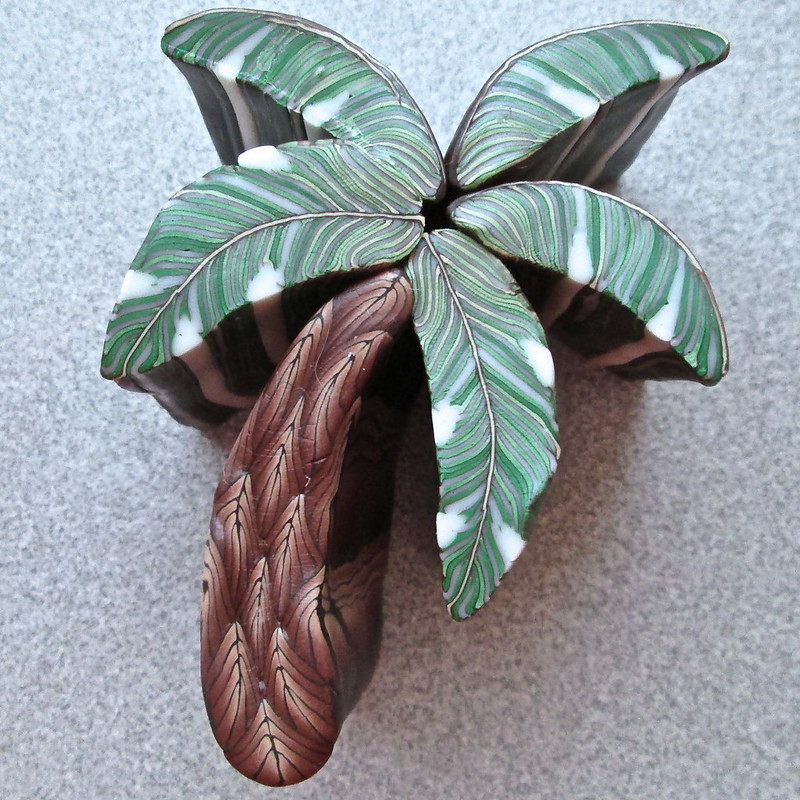
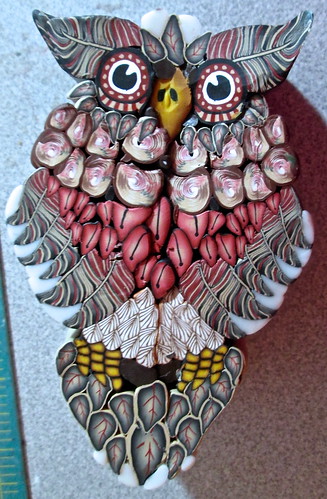
Everyone loves Owls!  In designing this, I was going back to the basics I teach in my student art classes - to break down what you're drawing into simple components. Squares, circles, cones, rectangles - they all make up the building blocks of the complex images we view every day. So I thought, "hmm, how about looking at caning that way. Using your simple basic canes to make up larger components to give it detail." There many very simple canes used to make this very complex cane and it's helping me to think of other images that I can translate to clay in this manner. I feel like I've just started something. =)  I was extremely tickled at the response on Facebook and Elaine Robitaille even shared my cane Craft Gossip yesterday!  Thank you, everyone!
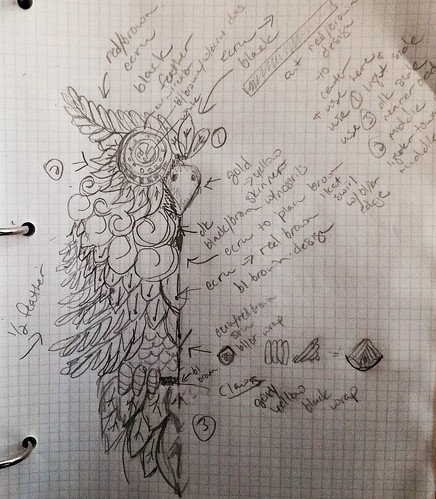
  I started out with a sketch in a 8x10" gridded notebook which I keep for all my polymer designs.  You can see my chicken scratches on my sketch below.  lol  I had an idea for colors and what the individual canes would look like.
Owl Cane design layout  Next I made some simple calculations using my drawing to determine how much clay I'd need for each cane.  I'm currently writing up a detailed article on this process because it's extremely helpful in planning your cane and - with a few more calculations - determining how much you need to reduce your image size to get a small cane that's easier to reduce.
  Building the individual canes that went into the larger cane came next.  Here is a photo of all the canes.  I used a feather cane, a shape-changing cane, a ikat swirl cane, and a couple of canes that were skinner blends with simple details cut into them.  The eye was a bullseye cane with a sliver removed and replaced with white, surrounded by other details.Building Block Canes  
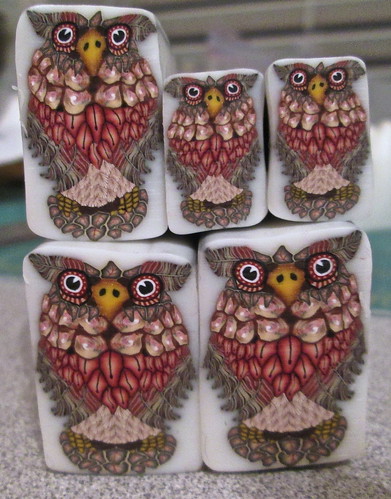
And finally the beak and claws were just a simple skinner blend with either nostrils cut in or wrapped in black and stacked.  You can see how each was then reduced and laid into the design in my cane before reduction below.  Now, the hard part - what to create with it?  Any suggestions?
  On a personal note - it's been a LONG month.  I was hoping to get back to my blog within a week a moving, but plans change.  I got sick with that nasty flu bug that's been hitting the Dallas area a few days before the move.  I was getting better when Mountain Cedar rolled in and - though I've never had allergies of note - I was run down and it hit me hard.  I'm still recovering from a sinus infection, a bit of bronchitis, and conjunctivitis in my eyes.  Being sick has always a craft vacation for me, but I couldn't see clear enough to work, which makes Deb a very unhappy camper.  I'm so glad to be on the mend!

Owl Cane
 

LinkWithin

Related Posts with Thumbnails